Trusted IP Ranges Easily whitelist IP addresses.
Navigate to the Trusted IP Ranges Application
Click the tab reading "IP Ranges" from the list of tabs at the top of your Salesforce org or click the last tab labeled (+) and click the link for "IP Ranges" from the list.
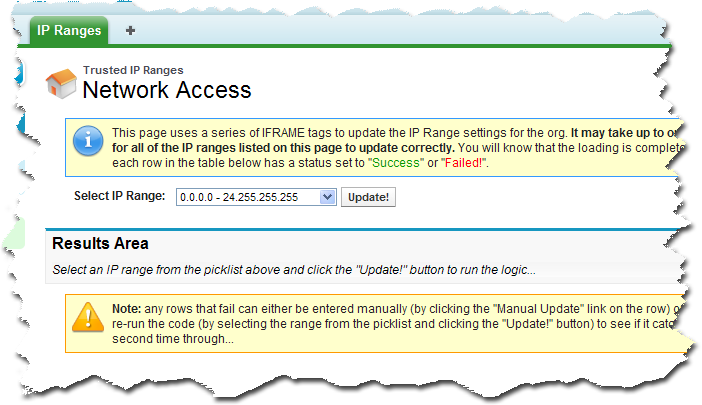
- If you do not see the "IP Ranges" tab in the list of available tabs then you must update your User profile so that the tab setting is set to "Default On" or "Default Off".
Select a range of IP addresses that should be updated
There is a list of IP ranges in the form of a picklist, which can be selected.
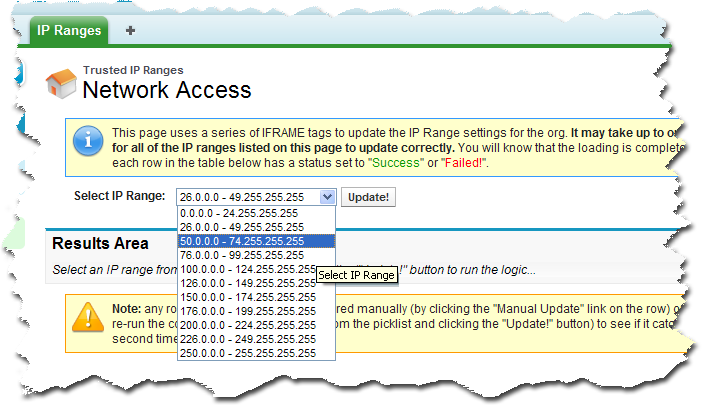
Choose one range from the list and click the "Update!" button.
- This step will need to be repeated for each range in the "Select IP Range" picklist.
Review the results of the application logic
Due to the nature of the application and the security that salesforce.com already has in place, it is possible that not every sub-range within the selected IPs will be updated in the Network Security settings.

- This step will need to be repeated for each range in the "Select IP Range" picklist.
Use the "Manual Update" link for one-off IP range updates
If you see that any of the IP ranges in the results area are listed with a "Failed" status then simply click the "Manual Update" link located on the left-hand side of the range in question
This action will display a new window with the IP failure ranges auto-populated. Simply click the "Save" button to have the network setting for this IP range saved to the org.
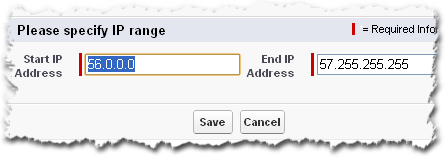
- This step may never be required or may be required multiple times for any value in the "Select IP Range" picklist.
Validate the Network Security changes were actually committed to the org
After all of the ranges in the "Select IP Range" picklist have been processed you will need to review the network settings page in the org setup in order to validate that the desired modifications have been made.
There are two ways to get to the Network Settings page in any org:
- Click the "View Network Access" link located at the bottom of the "IP Ranges" tab.
- Manually navigate to the page: Setup > Security Controls (Under Administration Setup) > Network Access
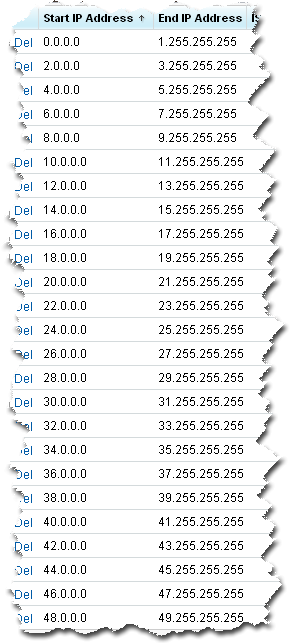
Scroll through the pages and ensure that no ranges were missed during the processing. You should find an entry (row) for each IP range in the application.
As a guide, you should scroll through six (6) pages with fifty (50) rows per page. The first entry should be 0.0.0.0 - 1.255.255.255 and the last entry should be 254.0.0.0 - 255.255.255.255.
- If any changes were made to the org Network Settings prior to using the Trusted IP Ranges application then the number of rows and the starting and ending range definitions identified above may be different.